LifeBook P7000 Disk Replacement
The hard disk drive of my two-year-old Fujitsu LifeBook P7010D
notebook computer died.
(Ironically, I had just installed Debian “Etch”;
time for another disk install.)
There isn't an obvious access hatch for the
hard drive, so it looked like replacing it was going to be a long job.
It turns out to require only minimal disassembly;
replacing the disk drive requires removing only three screws.
Still, laptops are delicate, and service should be performed only by a
trained professional.
-
Turn over, remove battery, remove DVD player.
-
Unscrew the three screws at the front. The right-most screw is
inside the DVD player bay and is flat-head.
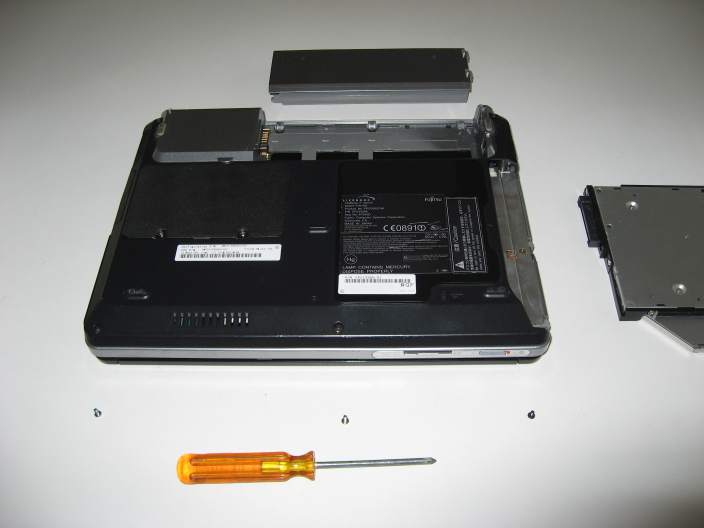
Here the screws have been removed and set on the mat near their
original site.
-
Turn notebook face up and open hinge flat.
-
Unhook palm rest (has the mouse pad) from front.
Start by getting a plastic screwdriver under the mouse buttons.
Fold palm rest carefully over keyboard (or disconnect lead).
-
Lift out disk drive from left and back sides. Slide the shock
absorbing sleeve off to the left. Disconnect the lead.
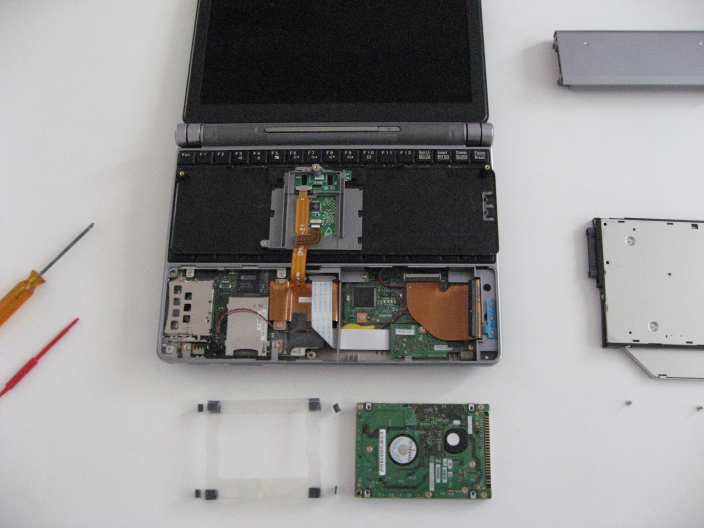
Here the palm rest is upside down on top of the keyboard,
the disk drive has been removed and set in front of its bay,
and the sleeve (with rubber shock absorbers) set to the left of the
drive.
-
When reassembling, note that the white dot on the disk drive shock
case is at the top front.
Credits
Thanks to the
jail.se P7010 site
and to Tim, Fujitsu notebook technician, who let me watch him work.
Related Sites
If you have the newer Lifebook P8010, see
P8010 HDD
Replacement.

